How to Restore Wooden Furniture? The Best Complete Step-by-Step Guide!
Share
The Best Complete Step-by-Step Guide: How to Restore Wooden Furniture
You know that piece of furniture in the corner of your living room or bedroom, with a dull paint job and signs of wear? You've probably thought about throwing it away, right? The good news is that you don't have to get rid of the piece! You can transform it and it will look as good as new. Is that really possible?
Yes! Many people are investing in restoring wooden furniture. In addition to being an eco-sustainable practice, it is economical and ensures the preservation of the piece for much longer. In other words, a process that only brings advantages!
Want to know how to restore wooden furniture? We have a step-by-step guide to help you. Check it out!
1. Assess the condition of the furniture
Before you begin, you need to carefully examine the furniture, noting all the details: scratches, stains, presence of termites, condition of the accessories. Take note of all of this. Only then will you have a clear idea of everything that will need to be done during the renovation.
To perform this diagnosis, a good tip is to remove the handles and hinges. This way, you will be able to have an even more complete view of the condition of the furniture.
2. List and purchase the necessary materials
By analyzing the furniture, it will be easier to list all the materials needed for restoration. However, some items are essential for renovating the piece. Check them out:
Sandpaper of different weights;
Wood glue;
Wood putty;
Rollers and brushes;
Wood paint in the desired color;
Damp cloth to clean the furniture;
Preparatory base for metals and wood;
Protective varnish for wood;
Newspaper or tarpaulin to protect the floor.
3. Choose a suitable location
One of the steps to learning how to restore wooden furniture is to find the right place to do the renovation.
The ideal location is an outdoor or enclosed space, but one that is spacious and airy, with windows and doors. This way, you will be able to prepare the furniture, sand it and paint it.
4. Focus on restoring wooden furniture
Check out a step-by-step guide that can serve as a guide for your work, helping you organize and carry out each stage of the process.
1. Remove the accessories: If you didn't remove the handles and hinges when analyzing the furniture, now is the time to remove them. This will prevent paint from splashing onto the accessories.
2. Clean the furniture: use damp cloths and flannels to clean it, removing all accumulated dirt such as dust, oil, grease, mold or any type of substance that could hinder the repair. Next, make sure that in addition to being clean, the piece is dry and ready for painting.
3. Repair and sand the furniture: to repair the wood, look for wood filler, which can correct surface imperfections such as holes, chips and dents.
The solution is an acrylic putty that is perfect for filling joints or repairing cracks in wooden surfaces such as floors, furniture, parquet floors, skirting boards and door and window frames, among other applications. It is ideal for sealing and sealing wooden surfaces, providing a smooth and colorful finish, as it accepts latex (acrylic) paint, lacquers, varnishes, polyurethanes, synthetic enamel, waxes, etc.
After adding the desired amount of dough, use a spatula or trowel to spread it out.
Once this is done, wait for the solution to dry to the sanding point:
30 minutes. Then, finish with 180/220 grit sandpaper. Sanding the furniture is essential to ensure the paint adheres.
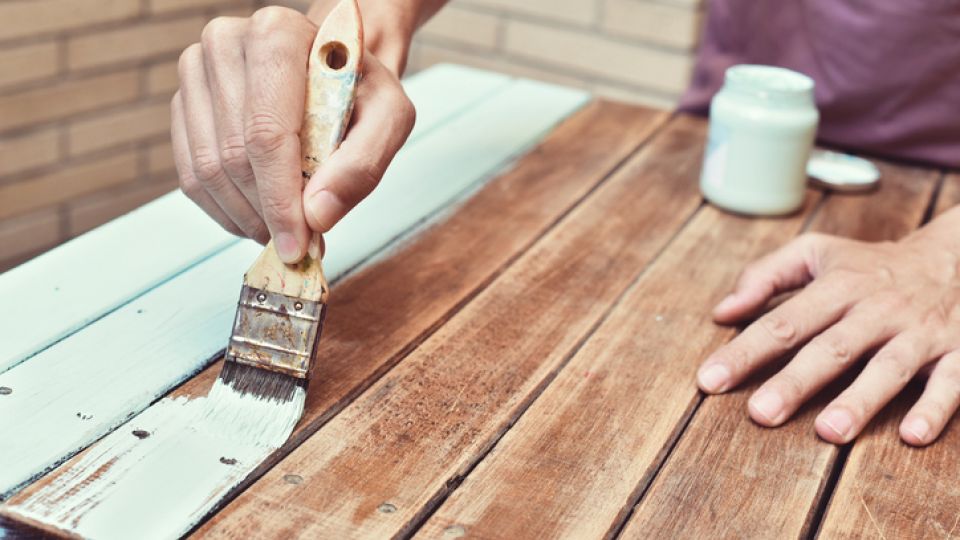
4. Paint the furniture: wait for the wood filler to dry completely, i.e. 24 hours. For a good finish, remember that the secret is to make movements in the same direction, in one direction, using a brush or paint roller.
To apply the second coat, wait for the putty to dry, which takes approximately 3 hours. With the second coat of paint, pay more attention to the details to ensure a more beautiful finish. After all, it is the paint that will give the furniture a new look.
5. Replace the accessories and take care of maintenance: after finishing the painting and waiting for the drying time, put the accessories back on the furniture. This is the last step: the piece is new and ready to use!
After learning how to restore wooden furniture, it's time to put your creativity into action and get to work. Once your piece is finished, don't forget to keep the furniture clean, polished and with the wood moisturized, so that it lasts much longer.